Do you have a Wi-Fi-Only Android tablet or looking for a way to use your 3G internet modem on your Android phone or tablet? Look no further, this tutorial is for you! I’ll show you how to use PPP Widget 3 to connect an internet modem to your device.
If you have been following the articles on TASMAG, I recently explained why I rooted my HP Slate 7 Extreme and how I rooted it with the Kingroot mobile application. Find the links to the articles below:
Why: My Rooted HP Slate 7 Extreme Android Tablet Ready to tie the knots with A 3G Internet Modem
How: Here’s How To Root Your Android Device Using Kingroot Mobile App
My HP Slate 7 Extreme is a Wi-Fi only tablet. Despite the fact that it is a tablet with no SIM card slot, it’s a very impressive tablet. That’s why I wrote the article titled: A Wi-Fi Only Tablet is not useless in Nigeria, you need to check that article out to see the different ways you can get internet access on your Wi-Fi only devices.
In this tutorial, I will be showing you the step-by-step guide on how to use a 3G internet modem on your Android devices; most especially Wi-Fi only tablets. Let’s dive in!
Four items needed for the connection
- A USB OTG (On-The-Go) Cable.
- An internet modem from your network of choice.
- A rooted Android device.
- PPP Widget 3 from the Play Store.

Procedure
1. Buy an OTG cable if you don’t have one yet. Buy OTG Cable on Konga
2. Go to the Play Store and download “PPP Widget 3”.
Note: PPP Widget 2 has been discontinued, therefore the images you see below are from PPP Widget 2. Click on the button below to download PPP Widget 3.
NOTE: This is a widget, not an application. After installation, you will need to locate it in the widget section and drag it to your preferred location on your home screen.
3. Connect your OTG cable to your Mobile device.
4. Insert the modem into the USB end of the OTG Cable.
Remember, your Android device must be rooted, if it is not, you will only get a “No root access” status on the PPP Widget 3 as shown in the image below. You can find information on how to root your android device here.

How To Configure PPP Widget 3
5. Wait patiently for the widget to read and get signal from the modem.
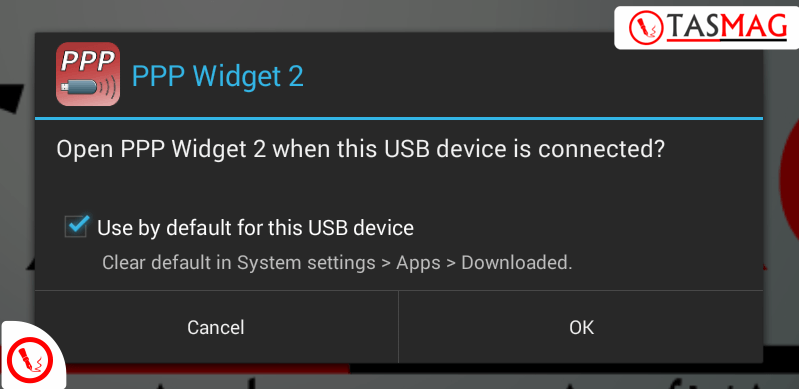
This is the first notification pop-up you will get for your first time connection.
6. Select the “Use by default for this USB device” and Click “OK”
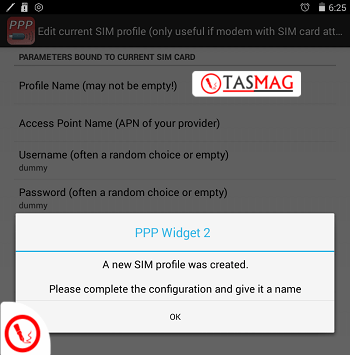
7. Click on “OK” to start the configuration.
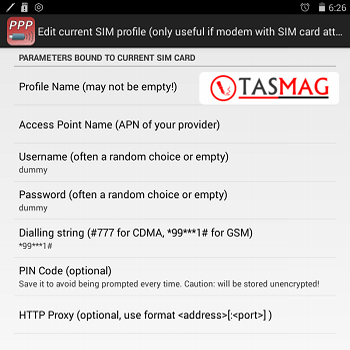
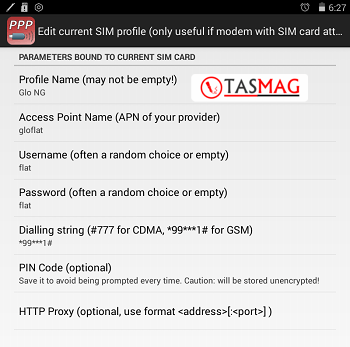
You will need to enter the network configuration settings of your mobile network of choice in the spaces provided above.
I have entered the configuration settings for Glo Nigeria as seen in the picture above. You might be wondering how come, since it’s an Airtel Internet Modem in the featured image for this article. Yes! I have unlocked that modem for use on any network.
You can find the configuration setting for other Nigerian mobile service providers below. The settings below are just what you need to configure PPP Widget 3 and does not represent the full configuration settings of these networks. You can contact your service provider to get the full network settings.
Airtel Configuration Settings
Profile Name: AIRTEL NG
Username: Internet
Password: internet
Access Point/APN: internet.ng.zain.com or internet.ng.airtel.com
Etisalat Configuration Settings
Profile Name: ETISALAT NG
Username: wap
Password: wap
Access Point/APN: etisalat
GLO Configuration Settings
Profile Name: GLO NG
Username: flat
Password: flat
Access Point/APN: gloflat
MTN Configuration Settings
Profile Name: MTN NG
Username: web
Password: web
Access Point/APN: web.gprs.mtnnigeria.net
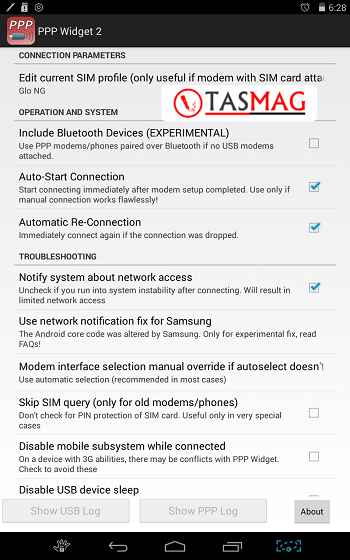
8. Press the back button on your device and you will be presented with the screen above, where you will need to select and deselect some options.
9. Select “Auto-Start Connection” only if you have successfully connected your device for the first time.
10. Select the “Automatic Re-Connection” option in order to automatically re-connect should your device go to sleep.
11. Select “Disable USB device sleep” if you don’t want the USB connection going to sleep, but this will consume more battery power.
12. It is also important that you “Disable mobile subsystem while connected” if you are trying this out on a 3G-enabled mobile phone.

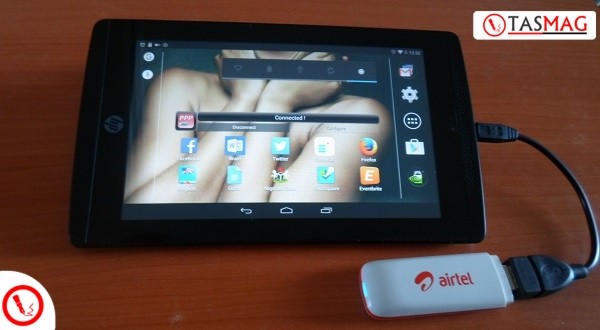
13. Press the back button and go back to where you pinned the PPP Widget 3 on your home screen. You will notice that the screen reads “Disconnected”.
14. Select “Connect” to initiate the connection for the first time. If you would like to change any configuration or reconsider your selected options, click on “Configure”.
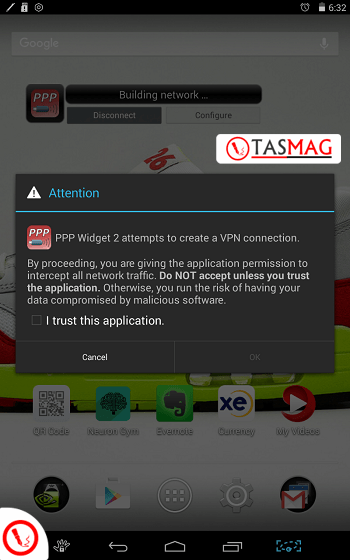
15. You need to check “I trust this application” and Press “OK” before you can be connected to the internet through the PPP Widget 3.
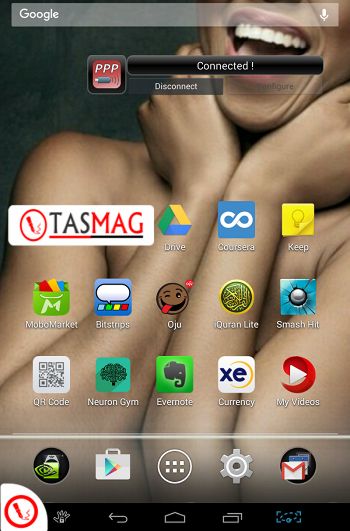
Congratulations! You are now connected to the internet on your Wi-Fi-only tablet with your 3G internet modem; made possible by the PPP Widget 3. You can now open your favourite internet browser and start browsing, ping or download apps from the Play Store. To end your connection, simply come back to the home page and click “Disconnect” as shown in the image above.
On a lighter note, you can see Chidinma with a big smile on my background after I successfully connected my HP Slate. I frequently change my Wallpaper from time to time and I don’t know why.
There are some known issues associated with using this widget on your Android device. You might get a notification that your SD card has been removed. Simply ignore that notification, you have absolutely nothing to worry about. Besides, the widget might start acting up, you can see that the modem is blinking but connection is not initiated. Simply remove the widget from your home screen, go back to the widget section and drag the PPP Widget 3 to your home screen again.
Moreover, it is normal to see that your WI-Fi icon is engaged and connected to “PPPWIDGET”. Should you have any problem with the configuration, let me know in the comment section below.
Special thanks to the guys at Blackline Android for the video tutorial. Click here to watch the configuration video on YouTube.


I bought a wifi only tab. I used ppp widget 3. I was unable to find root method for my tablet; the methods listed on internet do not work and presently it is not rooted.
I was however able to see “connected” on the ppp widget and a VPN symbol created. my usb 3g dongle (huawei e303c) has that steady light which happens when internet is “on”, but i cannot browse the internet still :(. any way to make this work?
Apologies for the late reply. Read this to unlock your device Here’s How To Root Your Android Device Using Kingroot Mobile App the app pretty much works for a lot of devices. After unlocking download “PPP widget 2” not 3 and follow the tutorial here. Let me know if you need further assistance.